
Recorder Walkthrough
In-depth functionalities
Click on any of the sections below (or even on the flowy recorder!) to see in-depth explanations, screenshots, and tips of each function.

Start
Start will be disabled until you select a recording area. After selecting, an informative pop-up related to the selected area will be displayed above the button.

Clicking Start will instantly start the recording. Floating controls will appear, displaying the recording time and a button to stop the recording. You can drag them anywhere on the screen.

If your camera is enabled, a floating window will also appear showing your camera preview. This window can also be dragged around, and it won't be visible in the recording.
Display/Window
This will open the internal macOS display/window picker. You can pick a specific window to record, or an entire display (from the top-right corner).
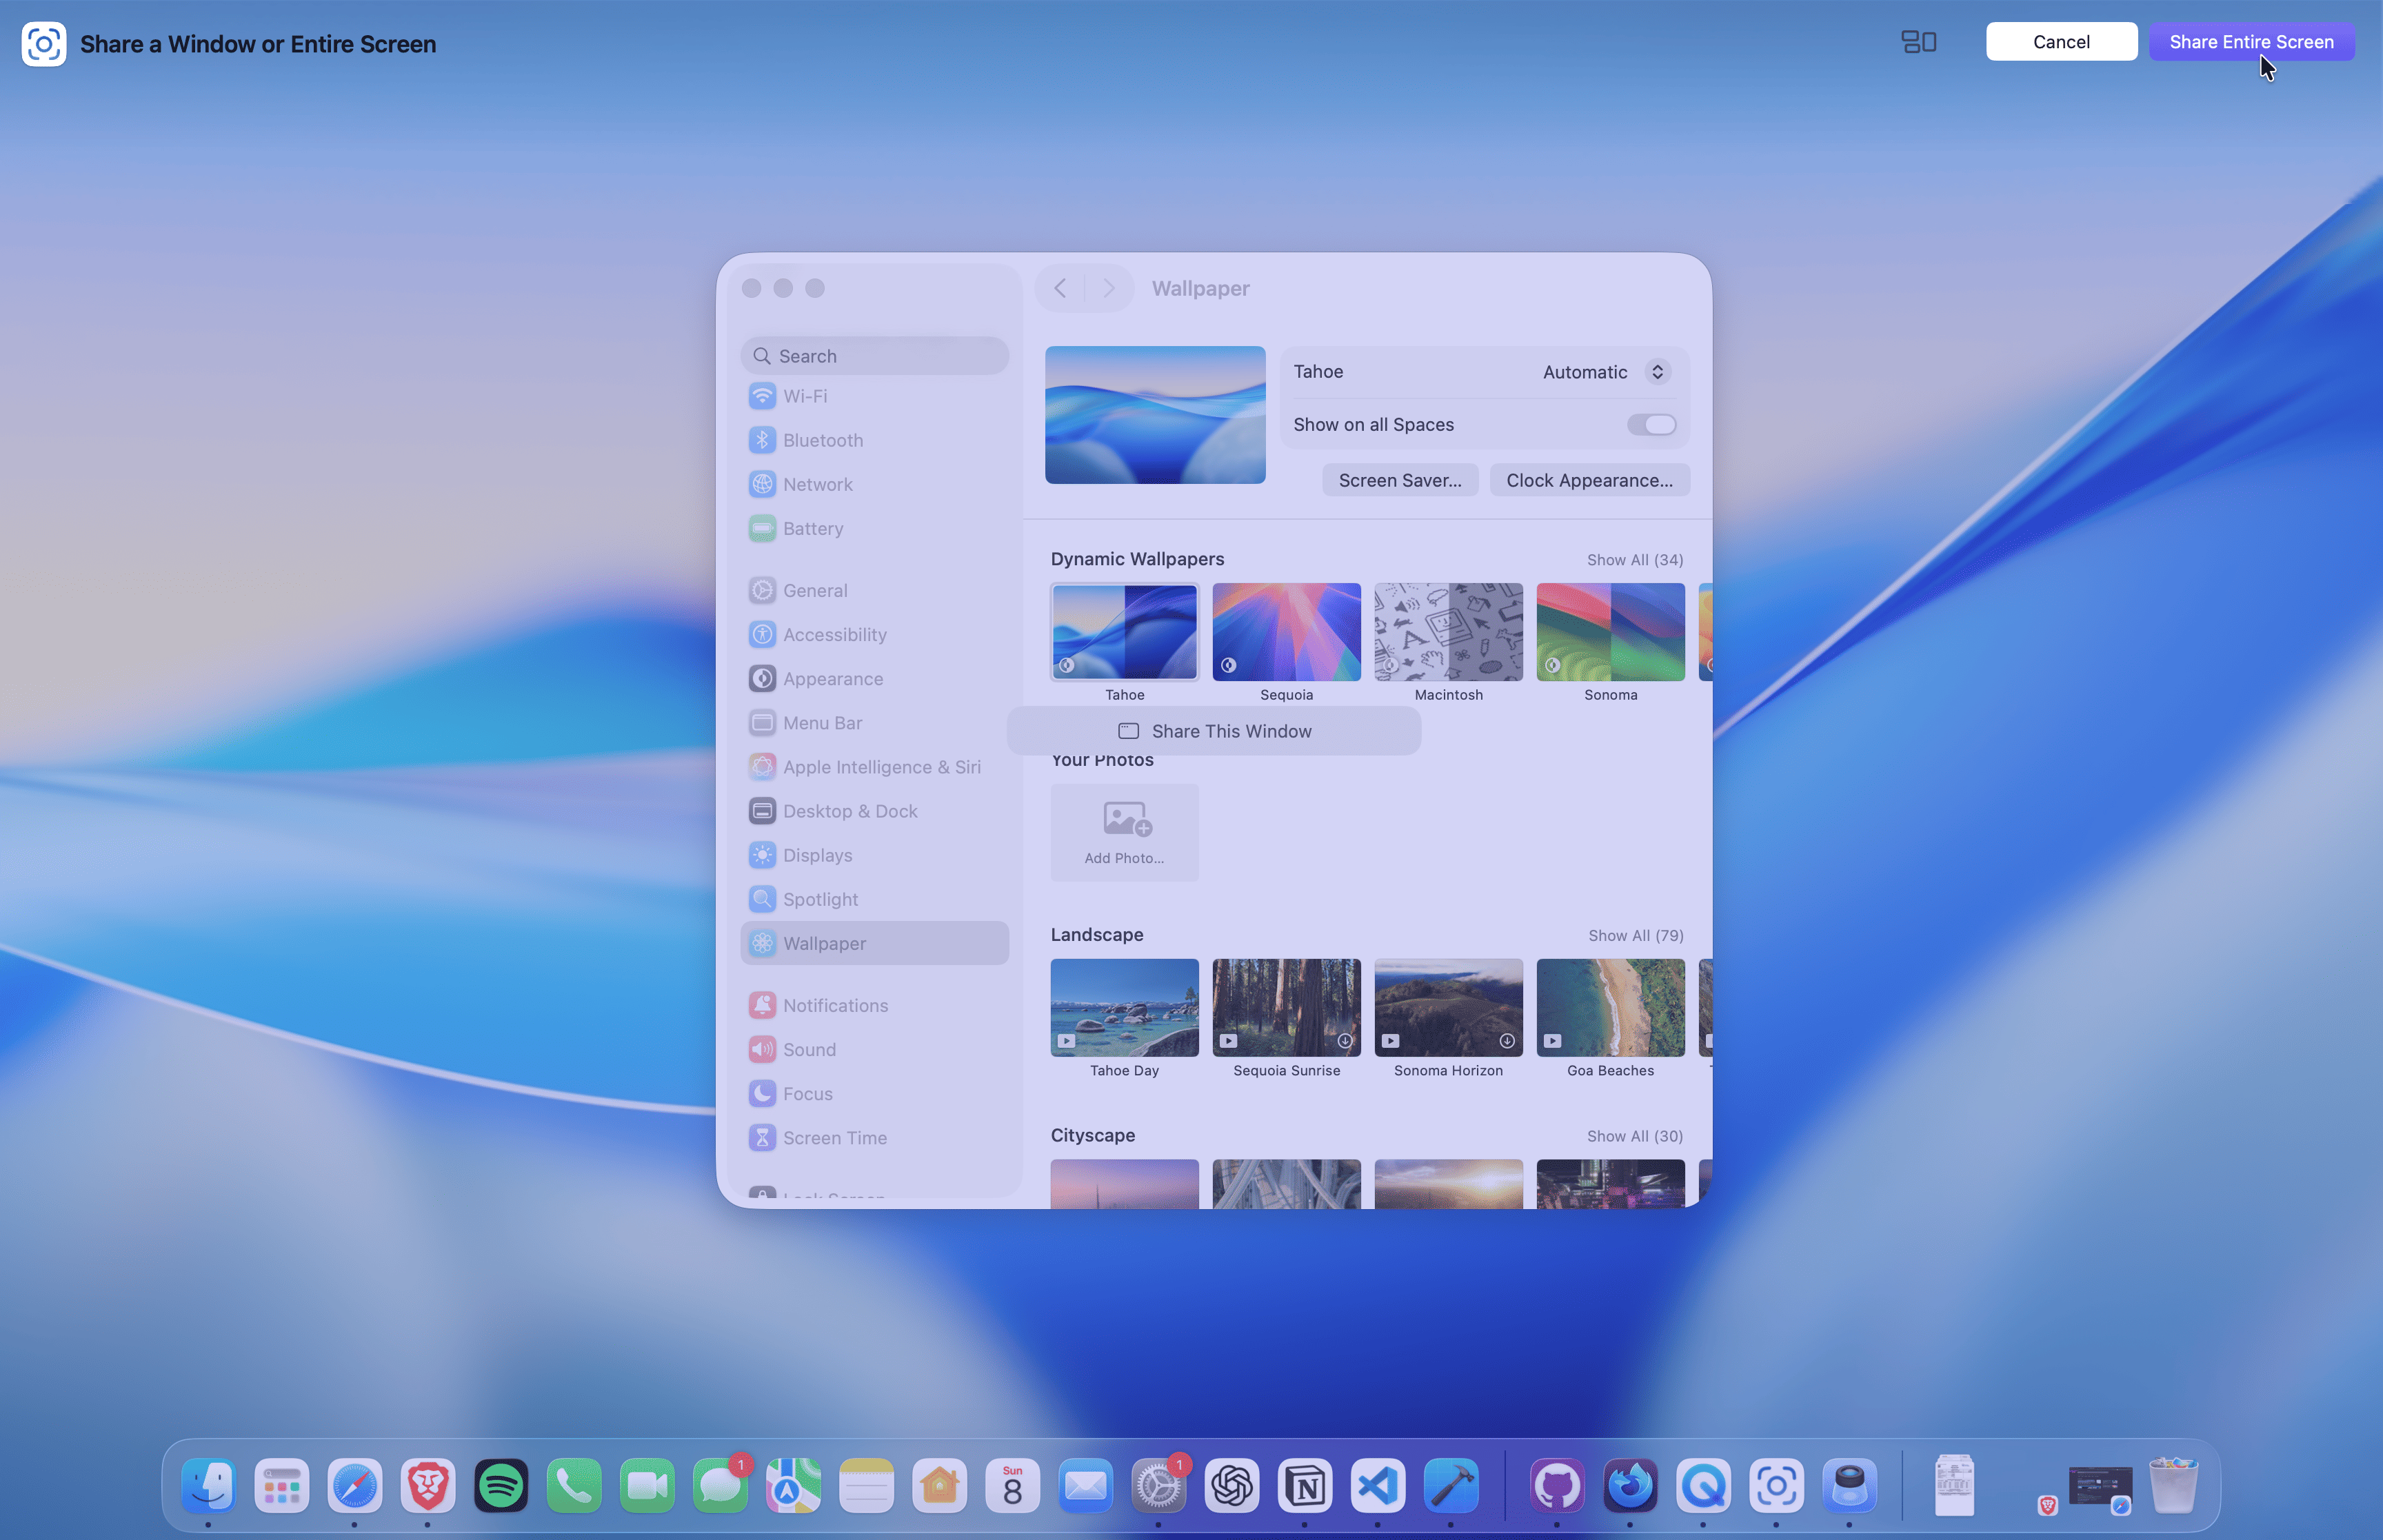
*Known Issue: On some machines the window 'Select' button might not be clickable. This is an internal macOS issue, and the only known workaround is to move the window around until the button becomes clickable.
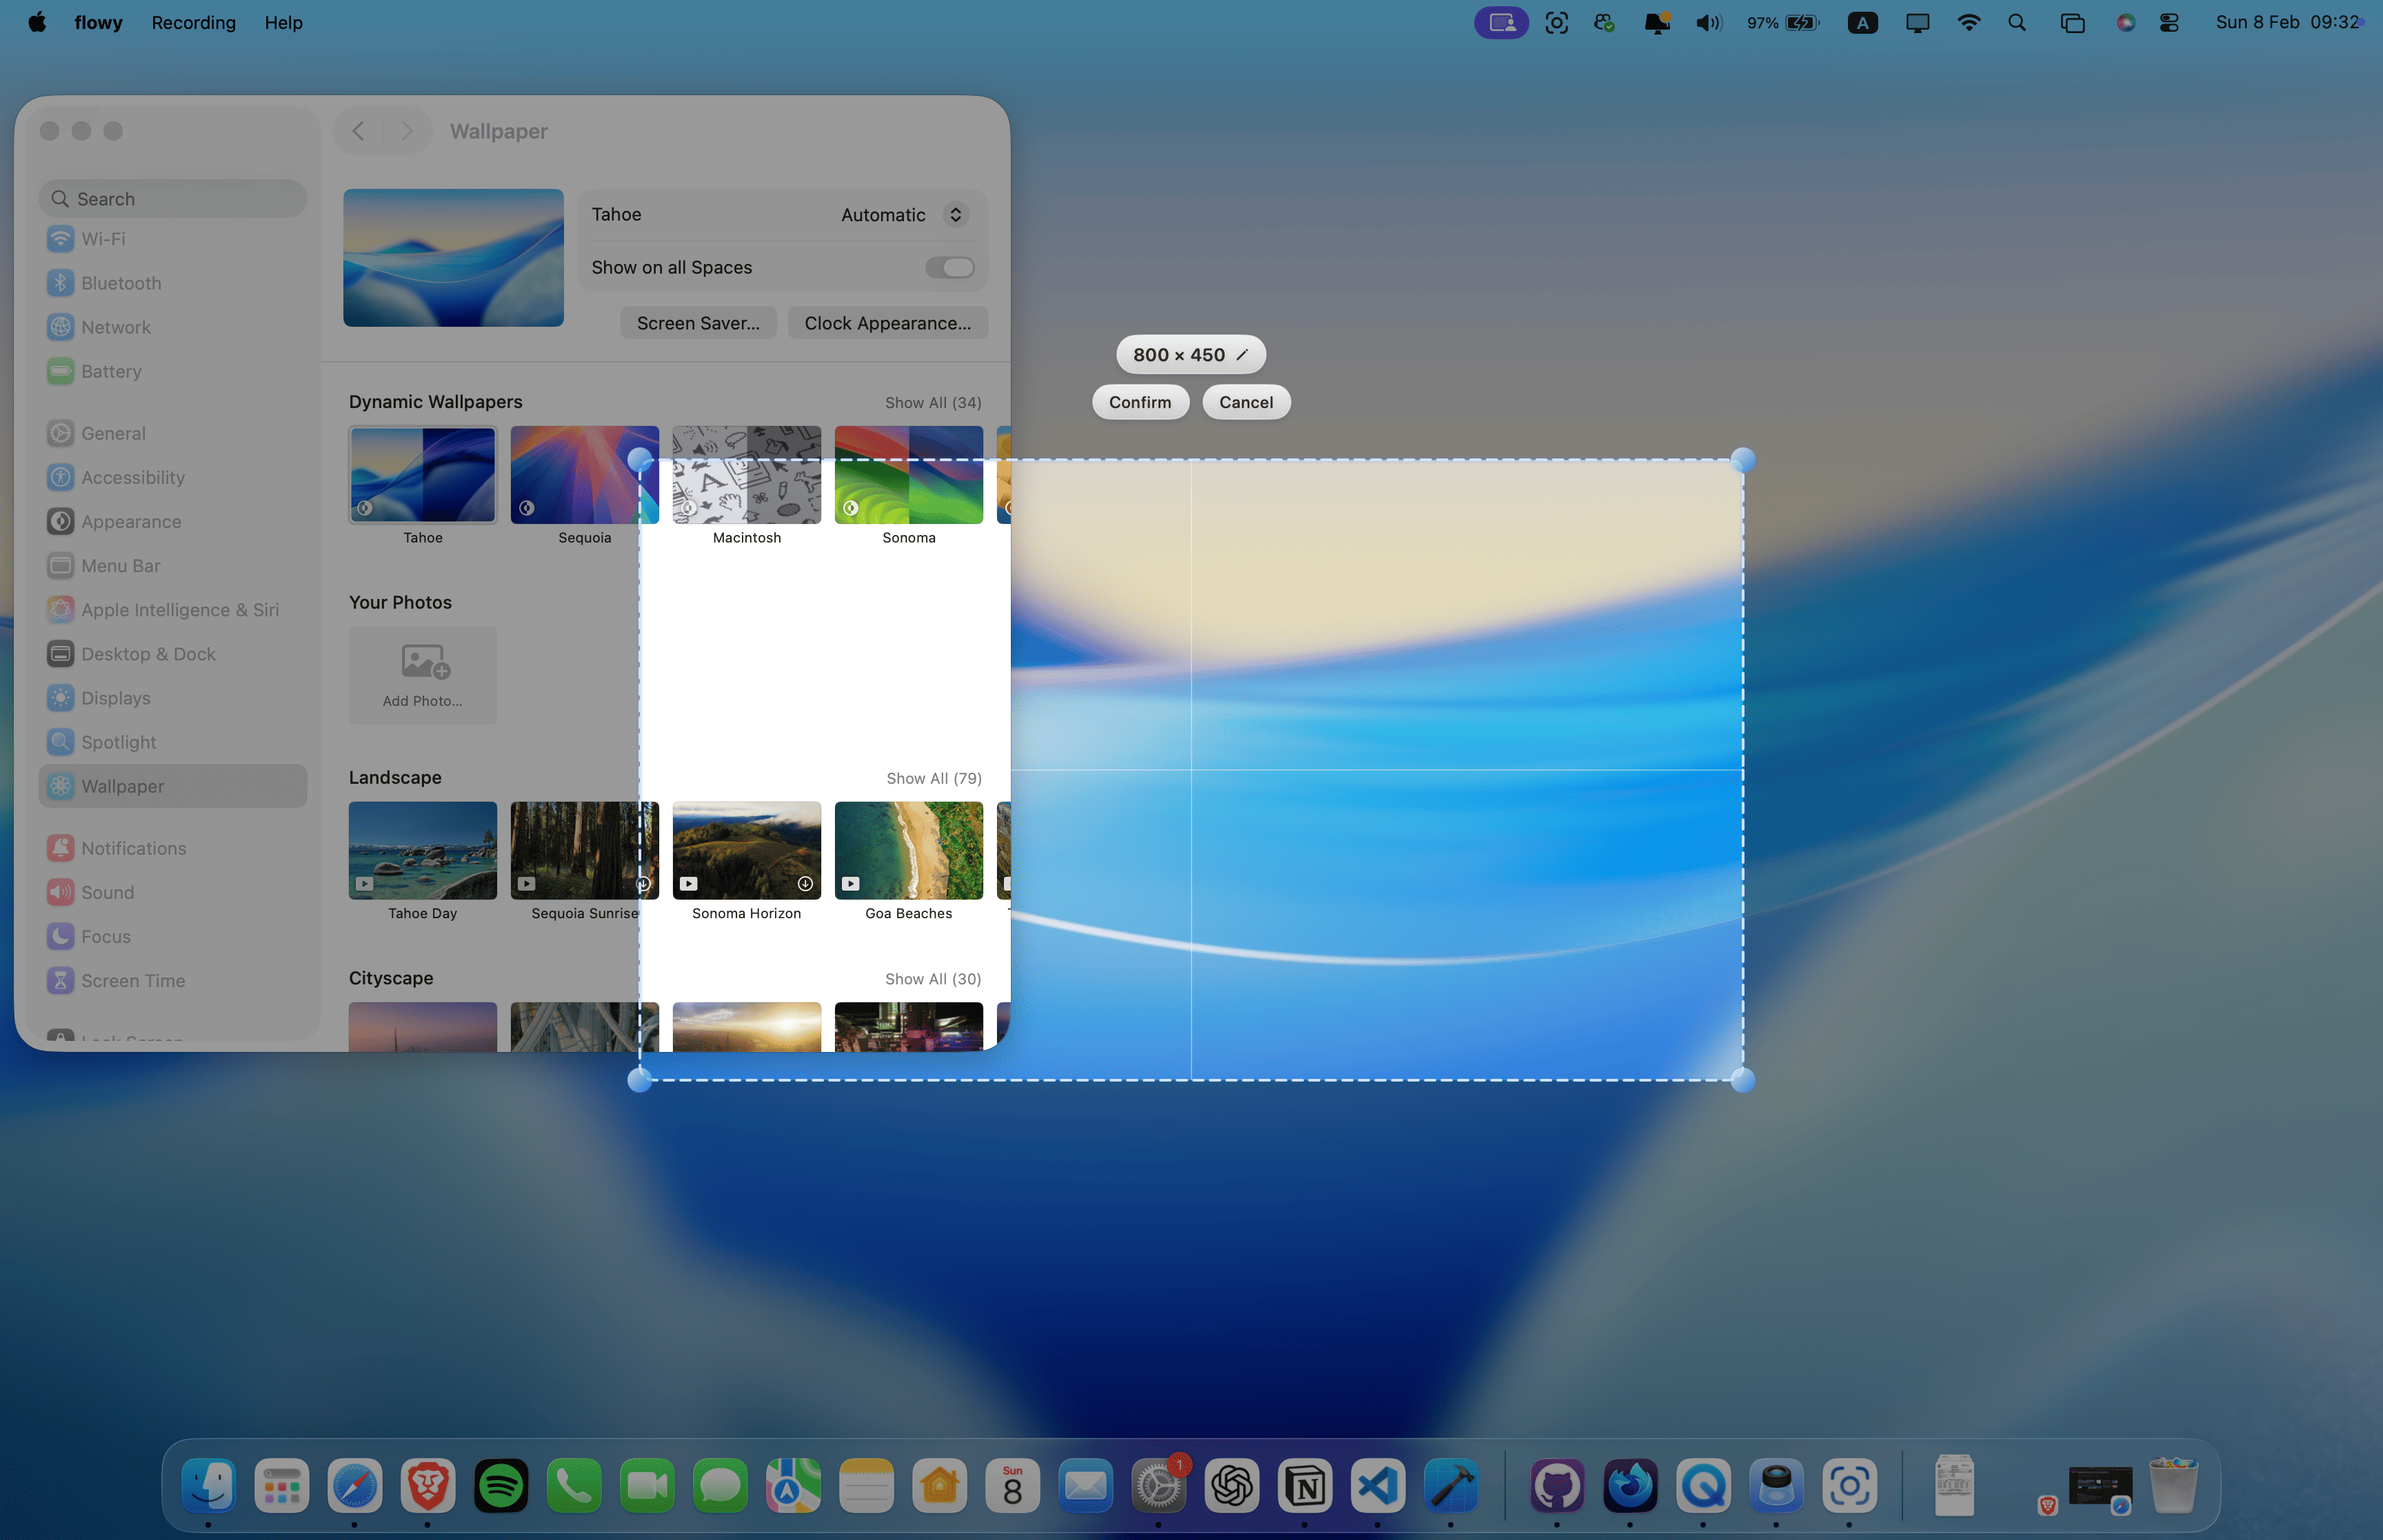
Cropped Area
This will open a resizable selection that you can move and resize as you want. Cut out any part of the screen or input a custom resolution.
Camera
While recording the screen, it will also record your camera. A floating window will appear showing your camera preview, but it won't be visible in the recording.
- You can drag the camera preview anywhere on the screen
- Change the camera selection from the menu's settings button.
- You can use your iPhone as a camera by selecting it in settings. This will provide a high-quality recording, by using the back camera.
Microphone
Enables recording your voice through the selected microphone.
- On the first time, enabling this will require microphone permissions. If declined, you can enable it later from System Settings (Privacy & Security -> Microphone).
- Change the microphone selection from the menu's settings button.
System Audio
Enables system audio in the recording. This is essential for any scenario where you want to capture system or in-app sounds.
- In case of display or cropped area recordings, all system audio will be captured.
- In case of window recordings, only the selected window's audio will be captured.
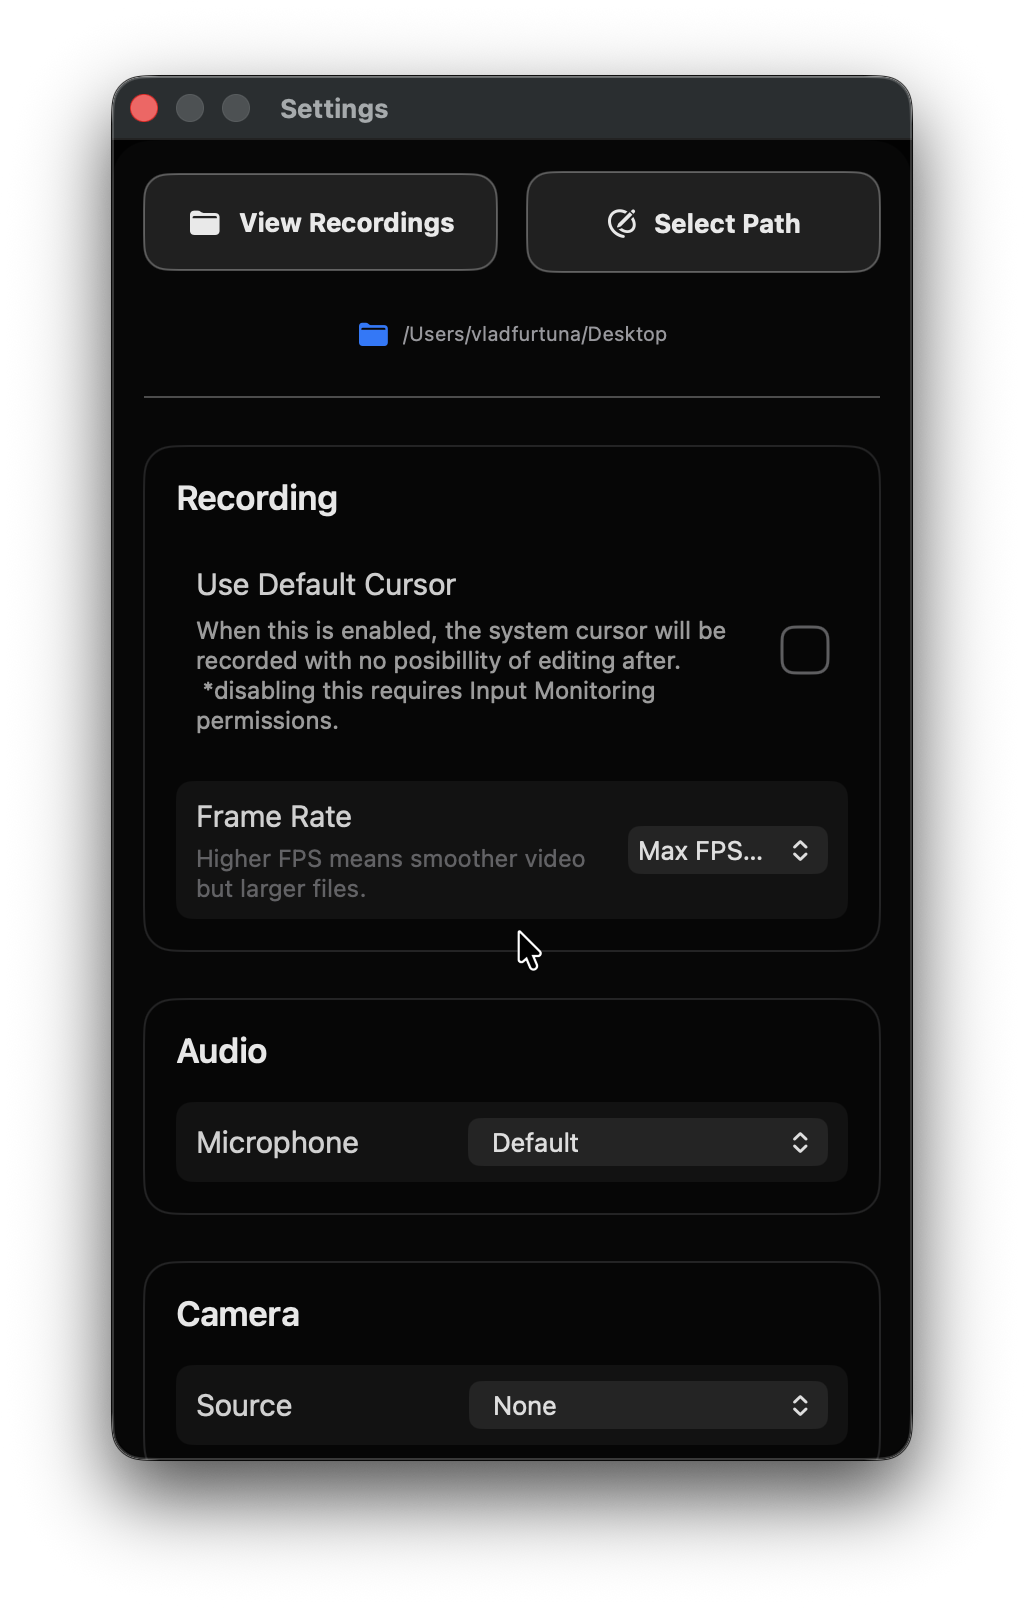
Settings button
It will open the recorder's settings. You can open your recordings directory (or select another one) and make changes such as: FPS, microphone, camera, cursor visibility.
Minimize button
Clicking this will hide the app, while keeping it alive. You can bring it back by clicking flowy's dock icon.
Quit button
This quits the app completely. Same as CMD+Q when app is in focus.
That's all
You are up to date with flowy's latest functionalities and fully ready to start recording. This post will be updated as more features are developed, so stay tuned!